
I forgot to take a complete before picture but I'll remember for next time.
First I'll list all the materials I used then I'll go over the process step by step.
Materials:
- QCS Stripwell
- Wise Owl OHE in Poseidon
- Iron Orchid moulds
- Well Bond Glue
- Amazing Casting Resin
- General Finishes water based gel stain in Antique Oak
- Dixie Bell Clear Coat in Satin (used only on the wood)
- Bells and Whistles decoupage paper
- Hardware, Already had but I believe I purchased it on Amazon
Process:
Step 1: Cleaned the entire Table with TSP
Step 2: I striped the parts that I wanted to keep as wood. (the top and those legs). I used QCS Stripwell, my first time using it. I found it dried way to fast so I ended up using plastic wrap around the legs, I have mixed feelings about it and am going to try it on a couple of other projects before I share my thoughts.


I let it sit for 30 min then started to remove the goop. For the top I scraped it off with a metal trawl, for the legs I used a wire brush I bought from the dollar store.
Step 3: Scuff Sanded the part that I was going to paint with 120 grit and sanded the wooden parts with 120 then 220 to prep for staining. Used my dewalt variable speed orbital sander and also my surf prep sander for the legs.
Step 4: Painted the body of the table with Wise Owl OHE in Poseidon, its such a pretty blue. I used a paint brush i'm still too chicken to use a paint sprayer and also it wasn't a very big area.


Step 5: Made the leaf decor with Iron Orchid Moulds and Amazing Casting Resin.
These were a little bit tricky as the leaf pattern extended past the drawer and needed to be cut so it could open. I outlined where I wanted them to go so once they were ready I was able to quickly mark were I needed to cut them. (The window for cutting the moulds is very short and once you pop them out you have about a min to cut them before they become to hard. If need be you can warm them up with a heat gun BUT it makes them much more brittle)
I glued all the pieces on with Well Bond and let them sit for 15min.


***I never got a picture of just the decals glued on before painting sorry.
Step 6: Stained the wood using General Finishes Gel Stain. I wasn't the biggest fan of this stain, I'll try it again but I'm still keeping my preference of oil based.
Pros: I liked that the waiting period was about an hour vs 3 days with an oil base (I like to use water based sealers) the colour really was beautiful, cleanup was so much simpler than oil.
Cons: It dried so quickly even in the small area that I was using, I found it was insanely streaky and left weird pigmented streaks that I ended up having to sand out. Price, its not cheap and few stores in Canada actually carry it, I purchased mine from Lee Valley. Application, its messy there is so much stain you have to wipe off and quickly before it dries.
This is how it looked after applying the stain before I sanded it with 600 grit paper lightly by hand. It removed that buildup of dark stain in the middle of it but I was nervous doing this as I didn't want to take off too much stain either.


Step 7+8: Painted the leaf decal and sealed the wood with Dixie Bell Clear Coat in Satin. I did 3 coats of Clear Coat.
This is hands down my favourite line of top coats. It goes on with a translucent white look so you can see where you've been and dries streak free.

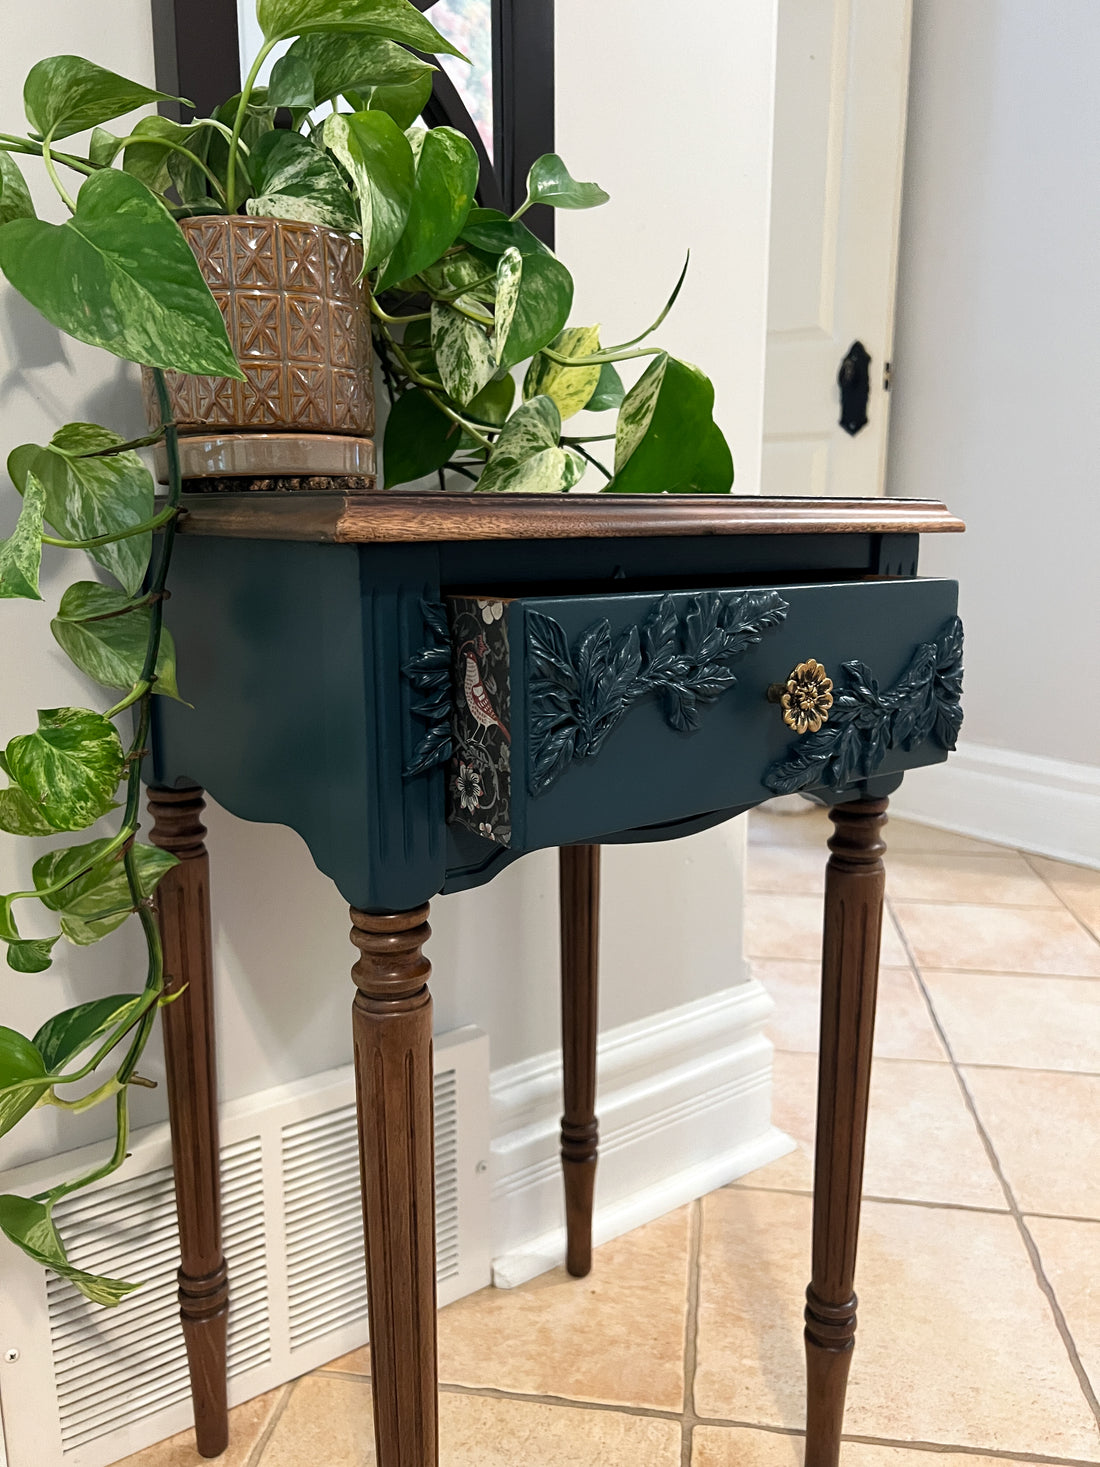
Step 9: She was pretty much done!! The last few things were finding a cute drawer pull and to add a drawer liner.

I ended up settling on a pull I already had, it was a cute little flower.
For the drawer liner I've had this decoupage paper from Dixie Belle for ages, I bought it cause it reminded me of a William Morris Print.
I watched a video on their website on how to apply it and added it to the inside and sides of the door.


Step 10: Wax and Photos
For older furniture I like to take some clear wax and go over the drawer slides, it makes them glide much better.
I staged the photo in-front of my entry way mirror. I was very fortunate to have this item sell within an hour of listing it.


Hope you enjoyed my little step by step.
Sorry about the spelling and grammar :)
-J
Furniture + Refinishing
1 comment
Is this chalk paint and what color is the bluish color?